Sunday, October 30, 2011

Baked Eggs With Chorizo and Tomatoes

I must confess that I am a morning person! Even on weekends I am up and about by 7:00am. Most of my friends would probably still be in bed and I do know some think I am mad to be up so early. But I find lazing in bed to be such a waste of time. By the time some of friends wake up at 10:00am I would have walked my dog, done my laundry and even gone to the supermarket to buy my groceries.

Baked eggs 1


One thing I do like about weekend mornings is breakfast. To me, these are the two days in the week that I do get to enjoy this meal. Sometimes I even treat myself to a "special" breakfast at home.

Baked eggs 6


This particular weekend was one of those "special" Sundays. I first had Baked Eggs when I was having a weekday breakfast at Riders Cafe. They were so good that I decided to try and replicate it at home. The dish came out beautifully done and I dunked pieces of toast into the ramekins to soak up every single bit of the baked eggs.

Baked eggs 2


Baked Eggs with Chorizo and Tomatoes
Serve: 2

Ingredients:

4 medium size eggs
50g sliced spicy chorizo sausage
1 large ripe tomatoe, chopped into 1" square (remove the seeds)
2 Tbsp thickened cream
8 basil leaves, roughly torn
Salt and pepper to taste

Method:

1) Pre-heat the oven to 180C. Lightly oil the insides of two one-cup size ramekins.

2) Divide the chopped tomatoes, basil leaves and chorizo sausage evenly and place into the 2 ramekins.

3) Then break 2 eggs into each ramekin. Season with salt and pepper. Drizzle 1 Tbsp of thickened cream on top of the eggs in each ramekin.

4) Bake the eggs until the whites are set and the yolk is frim around the edges but soft in the center. This should take about 15 minutes. Remove from the oven and serve immediately with toast or crusty bread.

Baked eggs 3


Baked eggs 4


Baked eggs 5

Tuesday, October 25, 2011

Cinnamon Rolls

I absolutely love, love cinnamon rolls! I remember the first cinnamon store that opened in Singapore about 18 or so years ago and there were long queques lining up the store front just to grab the rolls. I believe the store's name was Saint Cinnamon and it was located at Wisma Atria. As I am a born sucker for cinnamon rolls (and still am), I too joined the long queques. I would usually take away about 3 to 4 rolls to munch on during tea break or breakfast. Gosh the smell of freshly baking cinnamon rolls could entice any hungry soul that's for sure.

cinn roll 1


You could say that I have tried a few Cinnamon Roll recipes in my brief baking history. You will find one such posted recipe in this blog as well from my early blogging days.

cinn roll 2


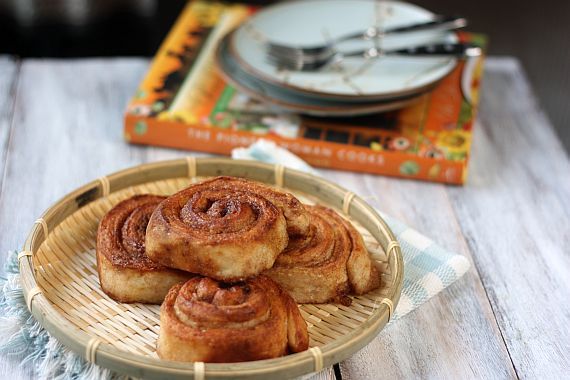
However I can swear that this particular recipe from The Pioneer Woman beats everything else hands-down. I love this recipe! So much so that this is my fourth time making these rolls. This is definitely a recipe for "keeps" in my book.

cinn roll 3


Cinnamon Rolls
Makes 15 rolls
Recipe Adapted from "The Pioneer Woman Cooks"

Ingredients for the Dough:

1 1/3 cup milk (I used low-fat milk)
1/3 cup vegetable oil (do not use olive oil)
1/3 cup caster sugar
1 1/2 tsp dry yeast
2 2/3 cups plain flour (plus additional 1/3 cup)
1/2 tsp baking powder
1/3 tsp baking soda
1 tsp salt

Ingredients for Sprinkling:

100g unsalted butter - melted
1/2 cup brown sugar + 2 Tbsp extra
3 1/2 Tbsp cinnamon powder
1/2 tsp nutmeg powder
1/2 tsp cloves powder
1/2 tsp mixed spice

Method:

1) Mix the milk, vegetable oil and sugar in a pan.

2) Scald the mixture (heat until just before the boiling point). Turn off heat and leave to cool for about 30 mins.

3) When the mixture is lukewarm to warm, but NOT hot, sprinkle in dry yeast. Let this sit for a minute.

4) Add 2 2/3 cups of flour into the milk mixture. Stir mixture together with a wooden spoon. Cover and let rise for at least an hour. The dough will still be very sticky to touch (but some of the gluten would have developed by then)

5) Add in 1/3 cup of flour, baking powder, baking soda and salt. Stir mixture together. (At this point the dough will still be sticky, you could cover the dough and put it in the fridge for about 30 minutes to firm slightly so that it'll be easier to handle. Alternatively you can leave it overnight or even a day or two in the fridge. This will give you a firmer dough. Just keep your eye on it and if it starts to overflow out of the pan, just punch it down).

6) When ready to prepare rolls, mix the sugar, cinnamon, nutmeg, mixed spice and clove in a bowl. Stir well to mix everything together.

7) Then sprinkle rolling surface generously with flour. Form a rough rectangle with the dough. Then roll the dough thin, maintaining a general rectangular shape about the size of a jelly pan. Drizzle melted butter over the dough. Next sprinkle the sugar mixture over the butter. (I find that in humid weather, it is easier to dot the dough with soften butter cubes rather than melted butter to prevent the butter from oozing out as you start to roll the dough)

8) Now starting at the opposite end, begin rolling the dough in a neat line toward you. Keep the roll relatively tight as you go. Next, pinch the seam of the roll to seal it.

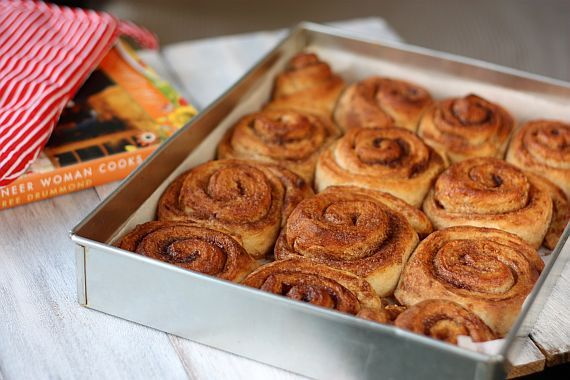
9) Cut the roll to approximately 1 inch thick and lay them in a greased baking tray. Leave a little space in between the rolls for them to rise.
Let the rolls rise for 30 - 40 mins. Then bake at a 180℃ pre-heated oven until light golden brown, about 20-25 mins. Serve warm.


cinn roll 5


cinn roll 4

Thursday, October 20, 2011

Apple Cake with Cream Cheese Maple Frosting

I am extremely excited to say that The Cake Slice Bakers is baking from a new book starting this month. The chosen book for the next twelve months is The Cake Book by Tish Boyle . I am sure some of you have heard of her before and if you have not you may want to check out her website . She is an amazing baker and has written a few books covering both cakes and cookies.

Apple cake 1


Each month a few recipes will be posted for voting and the most number of votes received for any cake recipe will be the choice bake for that month. To kick start our first cake from "The Cake Book" is a delicious Apple Cake which is full of apple chunks and walnuts. For some of you who are now experiencing fall, this recipe is so in tune with the season. When I was baking this cake my entire kitchen was filled with the smell of cinnamon and spices. It is such a delicious feeling and I could not wait to get the cake out of the oven to try a piece of it. I used a square cake pan to bake the cake and then used 3" cutter rings to cut out individual servings. These were frosting and then decorated with a sugarpaste rose on each small cake. Just wanted to give this cake an extra special touch!

Apple cake 3


Apple Cake with Cream Cheese Maple Frosting
Recipe Adapted from "The Cake Book by Tish Boyle"
Makes One 9" Cake Serving 12

Ingredients for the Cake:

1 1/2 cups all purpose flour, sifted
1 tsp baking powder
1 tsp ground cinnamon
1/4 tsp ground cloves
1/4 tsp nutmeg
1/2 tsp ground ginger
1/4 tsp baking soda
1/4 tsp salt
113g unsalted butter, softened
1 cup loosely packed light brown sugar
1 tsp vanilla extract
2 large eggs
2/3 cup buttermilk
2 cups peeled and chopped (1/2" pieces) Granny Smith apples (about 2 apples)
1/2 cup coarsely chopped walnuts

Method for the Cake:

1) Preheat oven to 350F and position rack in center of the oven. Grease the bottom and sides of a 9" square cake pan with parchment paper.

2) In a bowl add flour, baking powder, cinnamon, cloves, nutmeg, ginger, baking soda and salt. Whisk together and set aside.

3) In another bowl, beat butter and brown sugar until light and creamy for about 3 - 4 minutes. Add vanilla extract and beat until combined. Then add the eggs one at a time, beating well after each addition. Scrap down the sides of the bowl.

4) Then add in the flour in 3 separate additions alternating with buttermilk in 2 additions. Mix until blended (do not overmix though).

5) Finally add in the apples and walnuts. Pour into prepared tin and bake for 25 to 30 minutes until golden and a skewer comes out clean when inserted into the cake.

6) Cool cake completely before adding the frosting.

Maple Cheese Maple Frosting

170g cream cheese, softened
42g unsalted butter, softened
1/2 tsp vanilla extract
1/2 tsp maple syrup
1 cup icing sugar sifted
Pinch of salt

Method:

Beat cream cheese and butter until smooth. Add in the other ingredients and continue to beat until light and creamy. Place in fridge for about 30 minutes to harden slightly before frosting on the cake.

Apple cake 2


Apple cake 4

Friday, October 14, 2011

Strawberry Swiss Roll

I have always loved making swiss rolls as they are so light and fluffy. Plus the fact that it is so easy to put one together as well. Baking time is certainly shorter than that of a normal cake and I bet you that you will have more than a slice.

Actually for this particular recipe you need not confine yourself to making swiss or jelly rolls only. I have actually used the same recipe to put together a Strawberry Sponge Shortcake and also adapted it for a Blackforest Cake. I would usually make a swiss roll if I was craving for desserts and am not too much in a mood to make something more elaborate.

strawberry roll 2


Strawberry Swiss Roll
Recipe Adapted from "Judy Koh of Creative Culinaire"

Ingredients for the Cake Roll:

110g cake flour
1 tsp baking powder
1/4 tsp baking soda
50g caster sugar
1/4 tsp salt
60g vegetable oil (like corn oil or canola oil)
75g liquid (50g of strawberry puree + 25g of water at room temperature)
5 eggs (60g per egg), separate the yolks from the whites
1/4 tsp cream of tartar
70g caster sugar
1/2 tsp strawberry emulco or flavouring (optional)

Method:

1) Grease a full size jelly pan and line with parchment paper. Preheat your oven to 200C.

2) Sift together cake flour, baking powder, salt and baking soda into a clean bowl and set aside.

3) In another bowl, whisk by hand the egg yolks, 50g sugar, oil, strawberry puree and strawberry emulco until the mixture is light in colour and slightly thicken. This should take about 1 minute. (You can add a drop of food colouring to the liquid at this point of time if you want your roll to have a darker pink colour)

4) Add the flour mixture to the egg and whisk until smooth. Set aside.

5) In a clean bowl whip the egg whites until slightly frothy. Then add in the cream of tartar and continue to whip for about 1 minute. Then add the remaining 70g sugar and continue to whip until stiff peaks.

6) Fold 1/3 of the egg meringue into the yolk mixture. Fold gently until mixed well. Then add in the remaining 2/3 meringue and continue to fold gently using either a whisk or spatula. Fold only until the white streaks have disappeared. Do not overfold or you may deflate the batter.

7) Pour into the lined jelly pan and smoothen the top to ensure an even surface. Bake for 10 - 15 minutes or until the top is golden brown. Check at 10 minutes baking time - do not over bake or your roll will become hard.

8) Remove from oven and let cool for about 15 minutes before removing parchment paper. The roll should be completely cool before adding the whipped cream.

To Assemble:

1) Trim off the sides of the roll to have clean lines. Place the roll on top of a clean sheet of parchment paper. Place one side of the long end of the roll at the edge of the parchment. This will allow you to roll the jelly roll easily.

2) Spread the roll with some whipped cream mixed with strawberry jam. Leave a border around the edge.

3) Using the end of the parchment paper, start to roll away from you. Keep the roll tight as you continue to roll. Once you have finished use the parchment to wrap the entire jelly roll and place it into the refrigerator to set for about 3 hours.

4) To serve dust the roll with some icing sugar.

strawberry roll 3


strawberry roll 1


strawberry roll 4

Sunday, October 9, 2011

Vanilla Bean Creme Brulee

There are some desserts to are really classic and at the same time elegant as well. One of these which I consider is in this category is a creme brulee. I love a good creme brulee but simply dread the number of calories each serving has. But then again, such desserts are to be enjoyed only once in a while! I think a brulee is the sophisticated cousin to a custard caramel.

brulee 2


There are so many different flavours whcih you could incorporate into a brulee and not forgetting you could also add fruits as well. I toyed with putting together a fruit brulee but in the end decided to stick with the classics, a Vanilla Bean Creme Brulee. Such a treat too!

brulee 3


Vanilla Bean Creme Brulee
Serves 4

Ingredients:

2 cups heavy cream
5 egg yolks
1/2 cup sugar
1 vanilla bean pod
1/2 cup sugar (to topping)

Method:

1) Preheat oven to 275 degrees.

2) Pour the cream into a saucepan. Then scrape the seeds from the vanilla pod and add it to the cream. Drop in the empty pod as well. Place saucepan over a low flame and heat until it starts to simmer. Remove from heat and let it sit for half a minute.

3) Whisk egg yolks and sugar in a bowl until slightly frothy (about a minute). Slowly pour in the heated cream in a trickle into the egg mixture, stirring at the same time. Sieve the mixture and remove the pod. Pour the cream/egg mixture into ramekins.

4) Place the ramekins in a baking pan. Fill the baking pan with hot water, about halfway up the sides of the ramekins. Place the pan with the ramekins in the oven for 45 minutes to an hour or so. After 45 minutes, check them every ten minutes. You'll know they're done when you can stick a knife in one and it comes out clean. Remove the ramekins from the baking pan, set them on the counter, and let them cool for 15 minutes or so.

5) Then, put them in the refrigerator and let them chill overnight.

6) To serve, sprinkle a thin layer of sugar on the top of each, completely covering the custard. Using a hand-held blow torch, melt the sugar until it becomes a caramel brown colour.

7) If you do not have a blow torch, preheat your toaster oven to “Broil” and place ramekins in broiling tray filled with water (add as much water as possible to keep ramekins cool), let brown sugar caramelize (about 2min), then place ramekins in a fresh water filled baking tray to cool for a minute.

8) Garnish with berries, if desired.

brulee 1


brulee 4

Monday, October 3, 2011

Kuih Keria (Sweet Potato Doughnuts)

Kuih Keria or Sweet Potato Doughnuts is another all time Malaysian favourite tea-time snack. Unlike the other doughnuts which you may be more familiar with, Kuih Keria does not use yeast at all and as such there "rising" time associated with yeasted recipes is not required at all. Sweet potato is used in this snack and the proportion of it versus flour is more than triple.

keria 1


When I was a little girl (that's many decades ago), there was a street vendor who would peddle local snacks. He would have a long pole which he carried across the back of his shoulders and at the end of each pole was a covered basket. Inside the basket you will be able to find all sorts of goodies. As he walked up and down our neighbourhood, he would be yelling loudly "kuih, kuih" (cakes, cakes) to attract everyone's attention. How we loved peering into his basket to see what was the "catch of the day"! Those were the days when kuih was sold at 20 cents each. You can imagine the value of the dollar (well cents in this case) then. Now I can only get three pieces of kuih keria for $2.00.

keria 2


keria 3


Kuih Keria (Sweet Potato Doughnuts)

Ingredients:

350g (11 1/2 oz) yellow or orange-fleshed sweet potatoes
75g (1/2 cup) plain flour
1/2 teaspoon baking powder
1/2 tsp salt
Oil for frying
Caster sugar for rolling

Method:

1) Scrub sweet potatoes clean under running water. Place in a pan and cover with a generous amount of water. Boil until tender - test by inserting a skewer into the thickest part of the potato: it should go in without much resistance. Remove sweet potatoes from water and leave to cool.

2) When cool enough to handle, peel the skins. Mash sweet potatoes until free from lumps. Pick out any tough fibres and discard.

3) Sift flour, salt and baking powder together and add to mashed sweet potatoes, kneading lightly until smooth.

4) Break off small pieces of dough about the size of a lime (about 30g or 1 oz each) and roll into smooth balls, flouring your hands lightly to prevent the dough from sticking. Flatten the balls slightly and make a hole through the centre of each one with the floured handle of a wooden spoon. With your fingers, lightly pat the edges around the hole for a nice, smooth 'doughnut' finish. Repeat until dough is used up. Lay the doughnuts on a lightly-floured tray. Cover the doughnuts with a cloth to prevent it from dyring out whilst you shape the rest.

5) Heat oil in a pan or wok over medium heat. The oil should be about 2 cm (1 in) deep. Keeping the heat on low, fry the doughnuts until golden brown on both sides, about 6 to 7 minutes. Drain on absorbent paper.

6) Traditionally, these doughnuts are rolled in cooked melted sugar until the sugar crystalizes around them. An easier, healthier way would be to simply roll them in caster sugar. Serve soon after making.

Note: It is imperative that the temperature of the oil is kept low (the doughnuts should sizzle slightly upon contact with the oil). Frying doughnuts at too high a temperature will result in an unattractive, blistered appearance.

keria 5


keria 4
Related Posts with Thumbnails