Sunday, December 26, 2010

Orange Cinnamon Marmalade

Ever since I started blogging I would bake Christmas goodies for family and friends. However this Christmas has changed my life around on a personal basis and because of this, I am keeping this year's celebration to a very low key. However I did decide to do something and it was to make marmalade jam. I had been wanting to try making jam in the early part of this year but had put it off. Why? I guess the logical part of me said why put so much time into it when buying a jar off the shelf isn't really that expensive.

The next time the idea crept into my head, which was a couple of weeks ago, I decided not to use the logical part of my brain. I went ahead to make this over a weekend. The marmalade turned out very well, only slightly bitter (as what a good marmalade should be) and not overly sweet as I had reduced the sugar content in this recipe.
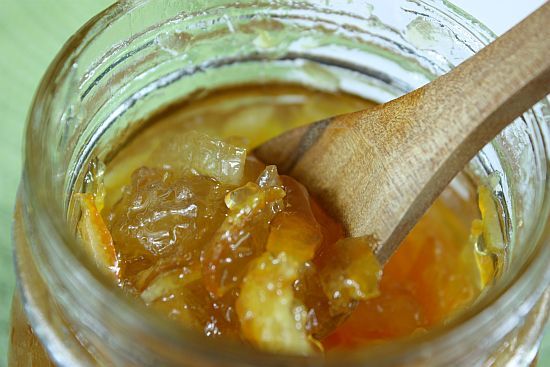
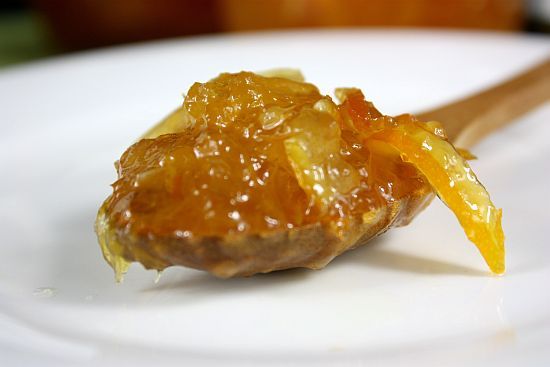
Orange marmalade 1


Orange marmalade 2


Orange Cinnamon Marmalade
Makes about 8 cups
Recipe Adapted from Taste.com.au


Ingredients:

1 kg (about 5 small) oranges, scrubbed
300g (about 2 medium) lemons, scrubbed
9 cups water
1.1 kg sugar
3 cinnamon sticks about 2" length

Method:

1) Thinly slice half the oranges and all the lemons. Then cut them up long strips.

2) For the remaining oranges, slice off only the rind part, leaving behind the white parts around the flesh of the oranges (a bit of the white part on the rind is fine). Then remove only the flesh of the remaining oranges. Cut the orange rind into thin strips and chop up the flesh.

3) Remove all the seeds from the oranges and lemons, and reserve aside. Wrap seeds in muslin to form a pouch and tie with a long piece of unwaxed string.

4) Place oranges, lemons, cinnamon sticks and water into a large heavy-based saucepan. Place pouch in fruit mixture and tie the string to saucepan handle. Bring to the boil over high heat. Reduce heat to low and simmer, uncovered, for 2 1/2 hours or until citrus rind is very soft. Squeeze excess liquid from pouch and then remove the pouch.

5) Reduce heat to low, add the sugar and stir, without boiling, until the sugar dissolves. Increase heat to high and bring to the boil. Boil, uncovered, for 20 minutes or until jam reaches setting point (105°C on sugar thermometer). To test, place a teaspoonful of jam on a cold saucer in the freezer for 2 minutes or until cooled to room temperature. Run a finger through the jam - if the surface wrinkles and the jam remains in 2 separate portions, it is ready.

5) Remove saucepan from heat and use a metal spoon to skim off any scum from the surface. Stand marmalade for 5 minutes to cool slightly. Ladle the marmalade into hot, sterilised jars (about 2-1itre [8-cup] capacity in total), seal and invert jars for 2 minutes. Turn jars upright and allow to cool. Label.

Notes:

To sterilise jars, wash the jars and lids in warm soapy water and rinse well. Place in a large saucepan and cover with water. Bring to the boil and boil for 10 minutes. Transfer jars and lids to a baking tray lined with baking paper and place in preheated oven at 100°C until dry. Use jars straight from the oven.

The marmalade will keep, unopened, for a year in a cool, dark place. Once opened, store in the fridge for up to 3 months. You will need a 10cm-square piece of muslin and unwaxed string for this recipe.
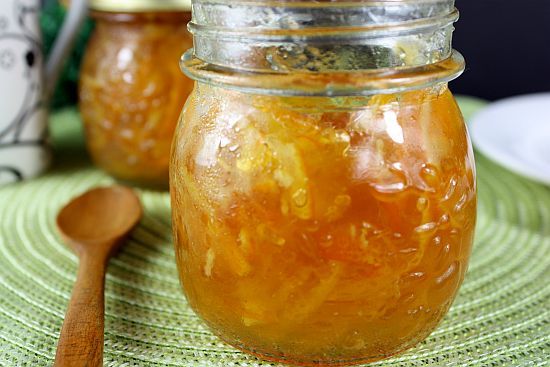
Orange marmalade 3


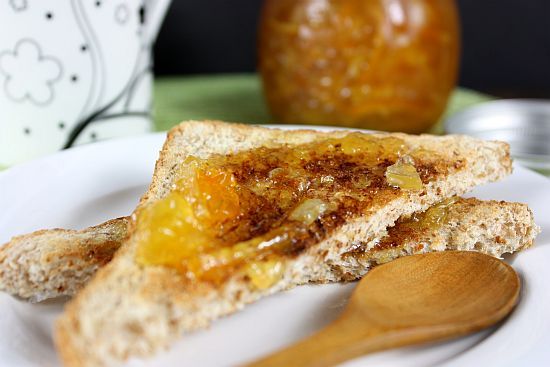
Orange marmalade 4

Friday, December 17, 2010

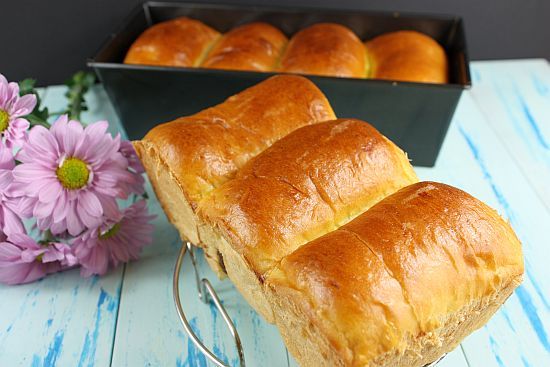
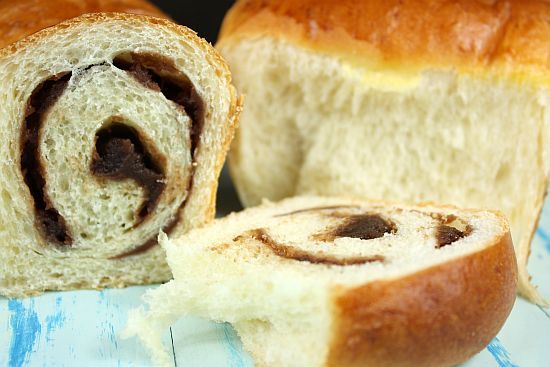
Japanese Style Red Bean Swirl Bread

I've met a number of food bloggers who swear by the "tangzhong" method of making breads and so far I have only tried this one time when I was making buns for my Mini Sliders .

The texture of the bread is slightly different and lighter using the "tangzhong" method. However with all home-made breads, I always think it's best consumed on the day they are made. I decided to make a "sweet" loaf rather than "savoury" as I had some left over store bought red bean paste (for my Singapore readers, I bought it from Phoon Huat). I used to fear making bread because I had to do it by hand. I can never tell whether I would have kneaded it enough or not. But ever since I've gotten my KA, it's such a breeze. However do ensure that you have at least half a day set aside when making any yeasted goodies.

red bean bun 2


red bean bun 5


Japanese Style Red Bean Swirl Bread (Tangzhong Method)
Recipe Adapted from here

Ingredients of tangzhong (湯種 )
(Enough for 2 loafs of bread)

50gm/ 1/3 cup bread flour
250ml/ 1 cup water

Method:

1) Mix flour in water well without any lumps. Cook over medium-low heat, stirring consistently with a wooden spoon, whisk or spatula to prevent burning and sticking while you cook along the way.

2) The mixture becomes thicker and thicker. Once you notice some “lines” appear in the mixture for every stir you make with the spoon. It’s done. Remove from heat.

3) Transfer into a clean bowl. Cover with a cling wrap sticking onto the surface of tangzhong to prevent from drying up. Let cool. Chill in fridge for several hours before using. (The tangzhong can be stored up to a few days as long as it doesn't turn grey. If so, you need to discard and cook some more.)

Ingredients for the Bread:

350gm/ 2½ cups bread flour
55gm/3 Tbsp caster sugar
5gm/1 tsp salt
1 egg
1 Tbsp plus 1 tsp milk powder (to increase fragrance, optional and can be omitted)
1/2 cup milk (I used low fat)
120gm tangzhong
2 tsp instant yeast
30gm/3 Tbsp butter (cut into small pieces, softened at room temperature)

Filling: Store bought red bean (azuki) paste

Method:

1) Combine all dry ingredients: flour, salt, sugar and instant yeast in a bowl. Make a well in the center.

2) Whisk and combine all wet ingredients: milk, egg and tangzhong, then add into the well of the dry ingredients. Knead until you get a dough shape and gluten has developed, then knead in the butter. The dough will be extremely sticky.

3) Keep kneading until the dough is smooth, not sticky and elastic. (I added an additional 2 Tbsp of flour just to incorporate the dough). Knead about 12 mins if using KA.

4) Knead the dough into a ball shape. Place in a greased bowl and cover with a wet towel or cling wrap. Let it proof till it's doubled in size, about 40 - 60 mins.

5) Transfer to a clean floured surface. Deflate and divide the dough into four equal portions (or more depending on your tin). Knead into ball shapes. Cover with cling wrap, let rest for 20 minutes.

6) Roll out each portion of the dough with a rolling pin into an oval shape. Spread a thin layer of red bean paste, leaving a 1" border along the sides. The start to roll from the upper, shorter end down to the bottom (as you would a jelly roll). Tuck in the 2 ends and place into your tin, with the sealed end facing downwards. Repeat with the remaining dough.

7) Arrange the rolled-up dough in a greased or non-stick loaf tin. Leave to proof again for 40 mins or until dough has doubled in size.

8) Brush whisked egg on surface. Bake in a pre-heated 180C (356F) oven for 35 to 40 minutes. Remove from the oven and tin. Transfer onto a wire rack and let cool completely. Slice to serve or place in an airtight plastic bag or container once it's thoroughly cooled.

red bean bun 3


red bean bun 4

Saturday, December 11, 2010

An Evening at Merlion Park

I happened to be at Merlion Park on Wednesday evening and it was a wonderfully cool evening as well. I could not resist joining the tourists who were there snapping their cameras away. I too had brought mine along with my tripod and snapped along with the crowd. I had not been there for a very long time and took this opportunity to take in the sights of the Marina Bay area.

The Merlion Park is located near Marina Bay, Singapore. This park is a popular tourist attraction. At the Merlion Park, a 40 tonne statute of a creature which is half lion and half fish sprouts an endless jet of water from its jaws. This creature has become the famous landmark of Singapore, the Merlion.

merlion 5


merlion 7


Just behind the Merlion, The Fullerton Hotel Singapore could be seen. The Fullerton Hotel Singapore is a five-star boutique hotel located near the mouth of the Singapore River, in the Downtown Core of Central Area, Singapore. It was originally known as The Fullerton Building, and also as the General Post Office Building before being refurnished to become a hotel.

merlion 3


merlion 6


The famous structure of the Singapore Esplanade (or fondly known by Singaporeans as "The Durian" due to its roof which resembles the spikes of a local well loved fruit) is also another tourist feature which is nearby, You definitely cannot miss this building when you are at the Merlion Park. The Singapore Esplanade is the melting pot of arts, music and drama, where overseas and local performances are staged. The Esplanade is probably as significant as the Sydney Opera House is to Australia.

merlion 1


Nearby you would be able to see a few hotels namely the Pan Pacific Hotel and the Marina Mandarin Hotel.

merlion 8


Right across the Marina Bay is Marina Bay Sands. Developed by Las Vegas Sands, it is billed as the world's most expensive standalone casino property at S$8 billion, including cost of the prime land. Marina Bay Sands features three 55-storey hotel towers which were topped out in July 2009. The three towers are connected by a 1 hectare sky terrace on the roof, named Sands SkyPark.

merlion 2

Friday, December 10, 2010

Sticky Asian Chicken Drumlets

There's something about chicken wings or drumlets that make such great finger food. And you really do have to use your fingers to tackle this meal. This particular dish is definitely a "finger licking" experience and after eating a drumlet you would want to lick all the sauces off each and every one of your fingers.

I can honestly say that I didn't follow any recipe. In fact I just grabbed whatever sauce I had either in my refrigerator or on my countertop to create this marinade. So if you are like me, just be creative, throw a few sauces together to experiment and who knows you may end up with a real winner of a recipe!

Chicken drumlet 4


Sticky Asian Chicken Drumlets
Serves 3 - 4

Ingredients:

20 pieces chicken drumlets
4 Tbsp terriyaki sauce
3 Tbsp honey
1 1/2 tsp soy sauce
1 tsp sesame oil
1 Tbsp sweet Thai chilli sauce
1/2 tsp 5 spice powder (or use mixed spice)
1/2 tsp white pepper (or you could use black pepper)

Method:

1) Mix all ingredients together in a large bowl. Add the chicken drumlets which you would have cleaned earlier and patted dry. Marinate the drumlets for at least 2 hours or better still overnight in the refrigerator.

2) Once marinated, remove from refrigerator and leave to near room temperature. Heat oven to 190C. Line a baking sheet with foil and spread the drumlets on the sheet. Brush the drumlets with the marinate sauce and set the remaining sauce aside.

3) Place drumlets in oven and bake for about 20 minutes or until cooked. Turn the pieces mid way to baking and brush again with the marinate sauce. Return to oven. Begin to check after about 15 minutes, making sure they are browned. Just 5 minutes before the drumlets are thoroughly cooked, you can pour the remaining marinate on top of the drumlets, turn them around to coat with the sauce and place it back in the oven for a final browning.

chicken drumlet 3


Chicken drumlet 1


chicken drumlet 4

Saturday, December 4, 2010

Chinese Carrot Cake

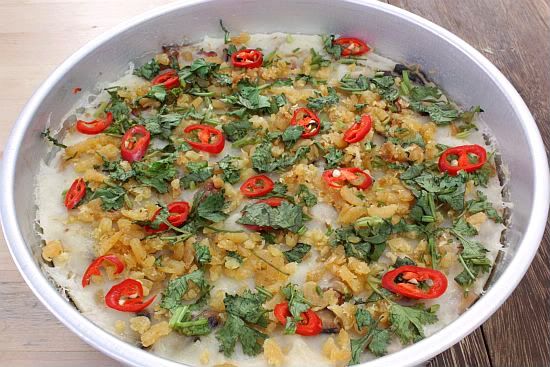
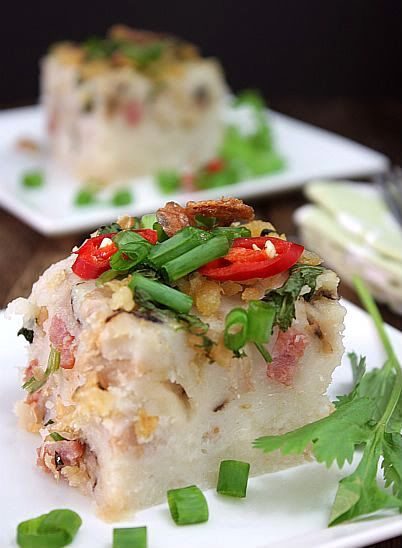
The name of this dish is Chinese Carrot Cake. However contrary to its name, "carrot cake", this particular dish does not contain any carrots at all and is not a cake in the usual sense of the word. The "carrot" in this recipe is actually white radish or "lobak" in Chinese. It is a savoury dish rather than a sweet and you can usually find this in most dim sum eateries. It is also sold in hawker stalls in Singapore and Malaysia. I love this dish a lot and to me the ideal Chinese Carrot Cake should have lots of ingredients, be moist and soft and served with a delicious sauce.

lobak 2


lobak 3


Chinese Carrot Cake
Recipe adapted from "Our Favourite Recipes"

Ingredients:

1 kg white radish (white lobak), shredded finely
300g yambean (bangkuang), shredded finely
350g rice flour
3 Tbsp cornflour
3 1/3 cup water
40g Chinese dried mushroom, soaked for 15 minutes, steams removed and sliced finely
60g dried prawns, roughly chopped
90g Chinese sausage (lap cheung) diced
60g lean pork, boiled and diced
Vegetable oil

For Garnishing:
4 shallots, sliced adn fried until golden brown
1 sprig coriander leaves, chopped finely
2 chillies, chopped finely

Method:

1) Heat 2 Tbsp oil in wok until hot. Fry mushroom, dried prawns, sausage and pork until fragrant, about 6 minutes. Add salt to taste, remove and set aside.

2) Then add the shredded radish and yambean into the wok and fry, stirring continously, till dry.

3) Add the ingredients from (1) to radish and yambean mixture. Mix well and set aside.

4) In a large mixing bowl, mix rice flour and cornflour. Gradually add water to the mixture and stir well to form a paste.

5) Add all the fried ingredients from (3) to the paste.

6) Oil a round 10" tin. Pour mixture into the tin and steam for 1 hour. Test with skewer. When ready, the skewer should come out clean.

7) Sprinkle crispy shallots. chopped chillies and coriander leaves on top of the cake. Garnish immediately whilst still hot to allow the garnishing to stick to the cake.

8) Allow cake to cool slightly before cutting into slices or cubes. Serve warm with either chilli sauce or a sweet sauce. The remaining cake can be wrapped and refrigerated. Cut out serving portions as required and steam before eating.

lobak 4
Related Posts with Thumbnails