Thursday, April 30, 2009

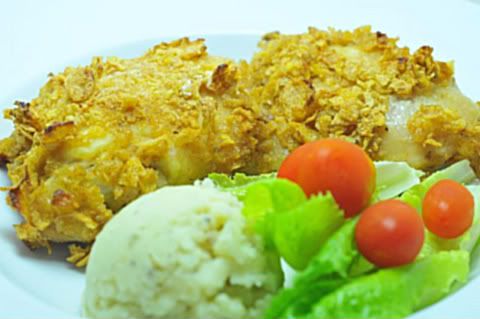
Crispy Baked "Fried" Chicken

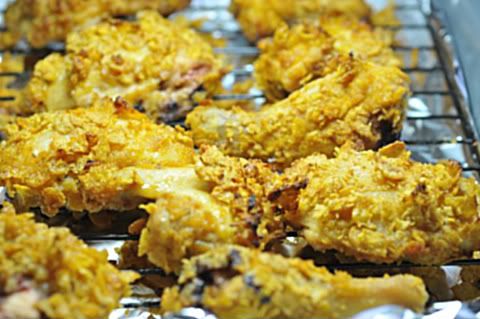
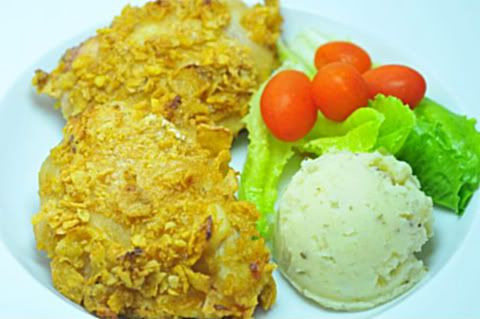
If you are a fan of crispy chicken (flashes of Kentucky Fried Chicken just swooped past) like me but absolutely hate messing up the kitchen with splatters of oil, etc, then you should really try this recipe. This was what happened to me when I came across this recipe one evening endlessly browsing through the internet for new ideas. I decided this would be our Easter dinner and to keep everything simple since it was just the two of us, I paired off the chicken with a simple mash potato and ceasar salad . The best part about oven fried chicken other than minimal cleaning up is that I could go about doing other chores or sit back and relax in front of the telly. Well to be honest we did have a small accident in the kitchen! I asked my husband to crush the bag of cornflakes by hand as mine was coated with flour and buttermilk. I guessed he crushed it a bit too hard and the opening split, spilling 1/3 of the cornflakes onto the kitchen floor. So in a way we did have a "mess" to clean up after all.


Crispy Baked "Fried" Chicken
Recipe from Food Network Magazine (February/March 2009)
Serves 4 to 6


Ingredients:

8 chicken pieces (preferably 2 breasts, 2 thighs, 2 legs and 2 wings)
1/2 cup all-purpose flour
Kosher salt and freshly ground pepper
4 cups cornflakes
2/3 cup buttermilk
2 tablespoons dijon mustard
1/4 teaspoon cayenne pepper
1 1/2 teaspoons paprika
3/4 teaspoon ground sage

Method:

1) Preheat the oven to 425 degrees. Place a rack in a roasting pan or on a baking sheet.

2) Rinse the chicken in cold water; pat dry. In a wide bowl or on a plate, season the flour with salt and 1/4 teaspoon pepper. Dredge each chicken piece through the flour so it's fully coated, tap against the bowl to shake off excess flour and set aside. Discard the flour.

3) Crush the cornflakes by placing them in a big resealable plastic bag, carefully pressing the bag to push out the air. Seal up the bag (with as little air inside as possible) and run over the flakes with a rolling pin. Open the bag and pour the crushed flakes into a wide bowl or onto a plate.

4) In a large bowl (big enough to dredge the chicken pieces), mix the buttermilk, mustard, cayenne pepper, paprika and sage. Give each floured chicken piece a good buttermilk bath and then roll in the cornflake crumbs.

5) Arrange the chicken pieces on the rack and place in the hot oven. Cook for 15 to 20 minutes, lower the heat to 375 degrees and cook for another 25 to 30 minutes, until cooked through and crispy. The juices should run clear when the meat is pierced with a knife.

Monday, April 27, 2009

Baking a Cheesecake With the Daring Bakers

The April 2009 challenge is hosted by Jenny of Jenny Bakes . She has chosen Abbey's Infamous Cheesecake as the challenge.

I was very pleased that we would be baking a cheesecake this month as this would be one cake my hubby will certainly enjoy. He’s not partaken of most of my Daring Bakers cakes (other than the savory recipes) as cakes and cookies are “off-limits” to him. Don’t think that this is due to any medical condition rather that he doesn’t fancy it at all. However if it has cheese as a main ingredient, it’s a total ball-game altogether. My brother-in-law is the same too. Both men will complain that the cake is too dense (trust me it is not), too much butter, too much flour, too eggy! My goodness, have you ever heard of such a string of excuses!

I very seldom make a “baked” cheesecake as I usually find them a bit heavier than chilled ones. Chilled ones are much creamier, lighter and has less steps as well. The couple of times I’ve made a baked cheesecake, the recipe did not call for a water bath. So in a way, this is something new to me as well. For this month's challenge I decided to tackle two different types of cheesecake; chocolate and berries. I halfed both recipes below and made them into 4" minis.


Chocolate Cheesecake with Valhora Chocolate Pearls
Make one 8" cake

For the Cheese mixture:

300g cream cheese
200ml whipping cream
120g caster sugar
2 whole eggs
4Tbs Dutch process cocoa powder
4tsp freshly squeeze lemon juice
1/2 cup valhora chocolate pearls

For the Crust:

180g Oreo cookies (w/o filling)
100g unsalted butter

* Cheesecake is best make using a spring form pan or a pan with removable bottom (I use the later).

* You can get your cake sliced just like the one they sell in the cafĂ© by following these simple steps: first soak a knife in a cup of hot water, wipe off with a towel, then cut the cake while knife is still warm. Try to cut it through with only one cut and do not “saw”. Whip off any cake crump/residue and slice again. Just repeat these steps and you will have neat and pretty slices of cake that rival what they sell in the patisseries.


Method:

1) Preheat oven to 160 degree C/325 degree F.

2) Wrap the bottom (up to half way) of the pan with 2 layers of foil paper. Boil some water for later use (appx. 2 liter).

For the crust:

Break the cookies into small pieces, then place into a zip lock bag or any heavy weight plastic bag (remove air bubbles), and crush + roll using a rolling pin until cookies become fine crumb. Place butter in microwave and heat for 1 min. over medium heat. Pour melted butter into the bag, remove air bubble and close the bag, then shake it to mix the two. Pour this mix into the pan; using the back of a large spoon, press crumb firmly to pan until packed; set aside.

For the cheesecake:

1) Place the cream cheese in a mixing bowl. Using a whisk, whisk cream cheese until blended; add the other ingredients in the following order, sugar --> cocoa powder --> eggs --> lemon juice --> whipping cream, make sure that each item is well blended before adding another. Strain the cheese mixture then pour into the cake pan. Then randomly drop in the chocolate pearls.

2) Pour hot water (1 inch in depth) into a roasting pan, place the pan inside the roasting pan and bake for 45 - 50 minutes. If the water dried out while baking, be sure to refill with more hot water. Once the center of the cake no longer quiver and the sides begin to pull away from the pan then it is done. Remove from oven and let cool completely on wire rack. Place in fridge for overnight to set.

Dark Chocolate Glazing

100g whipping cream
125g water
40g cocoa powder
160g granulated sugar
10g leaf gelatine

Method:

1) Pre-soak gelatine in a bowl of cold water, squeeze out excess water; set aside. If using powdered gelatine, add 2 spoon of water.

2) Place whipping cream, sugar and water in a saucepan and bring to boil over medium heat. Then add in the cocoa powder and bring to boil again or till mixture slightly thicken; stir constantly to avoid mixture sticking to saucepan. Remove from heat and let cool for a few minutes then add the pre-soaked gelatine; stir until completely melted; strain. When cool to lukewarm, pour glazing onto cheesecake and let some drip down the sides. Place back into fridge for another hour before serving.

3) For final dressing, pipe rosettes of whipped cream around the edge of the cake before serving.


Yogurt Berry Cheesecake

Graham Cracker Base

1 1/4 cups wholewheat cracker crumbs (you can use graham)
3 Tbsp sugar
4 Tbsp butter
1 tsp of cinnamon

Cheesecake Filing:

8-oz cream cheese, room temperature 113g
16-oz citrus flavoured yogurt (or natural yogurt), room temperature
1 cup sugar
4 large eggs, room temperature
1 Tbsp of lime zest
1 tsp lime juice
1 Tbsp vanilla extract
pinch salt

Method for the Crust:

1)) Combine all ingredients in a medium bowl and stir until well combined. Press into a 9-inch springform pan, pressing the crust slightly up the sides if you don’t wish to have a thick crust on the bottom.

2) Prebake a graham cracker base into a 9-inch springform pan; a 9-inch graham cracker pie crust should work fairly well, too. This cheesecake can also be baked without a crust.

Method for the Filing:

1) Preheat oven to 350F (176C)

2) Wrap the bottom of the pan with double foil paper. Boil some water for later use (appx. 2 liter).

2) In a food processor, blend cream cheese, yogurt, sugar, eggs, zest, juice, vanilla extract and salt until mixture is very, very smooth.

2) Pour hot water (1 inch in depth) into a roasting pan, place the pan inside the roasting pan and bake for about 40 - 50 minutes. If the water dried out while baking, be sure to refill with more hot water. Once the center of the cake no longer quiver and the sides begin to pull away from the pan then it is done. Remove from oven and let cool completely on wire rack. Place in fridge for 3 hours or overnight to set.

3) Cool to room temperature before refrigerating. Refrigerate overnight before serving.

4) To serve top the cheesecake with a mixed berrie (blackberries, raspberries and blueberries) compote and sprinke some lime zest on the top as decoration.


Friday, April 24, 2009

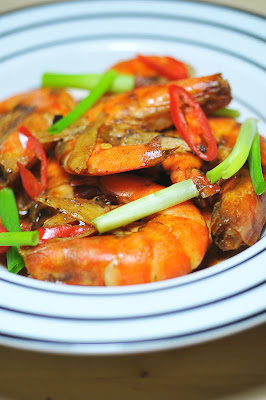
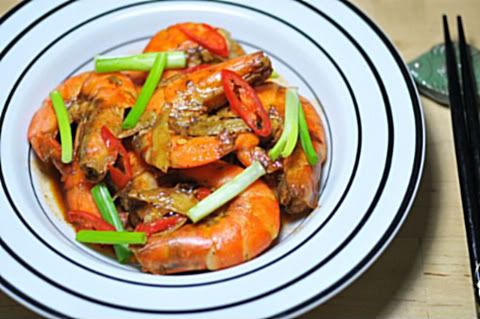
Tamarind Prawns

I believed I first discovered tamarind marinated prawns during a party when a girlfriend of mine used tamarind pulp to marinate a plate of prawns to be put over the BBQ pit. The end result was extremely delicious. I've not made this dish for sometime now and as I had some prawns in the freezer, this seemed an appropriate time. Even though our weekends can sometimes be quite hectic, I didn't really want to eat out again. There is really nothing like home cooked food, even though it may the simplest dish. This particular dish works best if you are using the freshest prawns available and you have to serve it hot with a bowl of steaming white rice. I guess egg noodles will also work though I've not tried it.


Tamarind Prawns
(serves 4)

Ingredients:

500g large prawns with shells
1 ball of tamarind pulp about the size of a large grape mixed with 3 Tbsp of water. Strain and set aside the juice
Soy sauce and white ground pepper, to taste
1-2 tsp of sugar (suggest you add a bit first to taste)

Method:

1) Remember that when seafood comes into contact with tamarind, they tend to get a bit mushy and overly soft. Therefore, always refrain from seasoning and leave the seafood standing for too long. However, if you have tough meats, you may season them with tamarind to make the meat less tough.

2) Therefore, what you need to do is to have a quick, thorough seasoning and drop the whole thing into the wok.

3) DO NOT put any oil at this juncture. Leave the prawns to dry up a bit before adding oil because there is nothing worst than tamarind prawns with wet, gravy.

4) Once you add the oil, leave the prawns to fry till dry and fragrance. You can either cook it extremely dry and nice or leave a little gravy to mix with your white rice. Heavenly, either way.


Monday, April 20, 2009

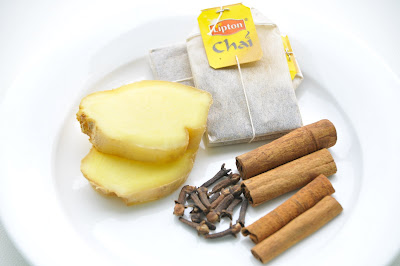
Chai Cake with Honey Ginger Cream

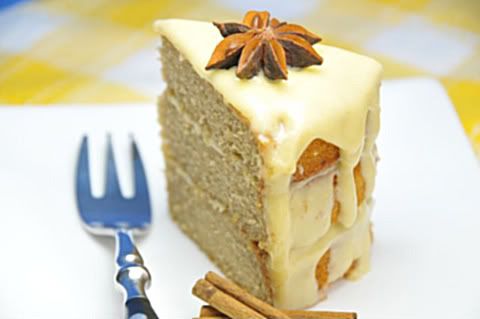
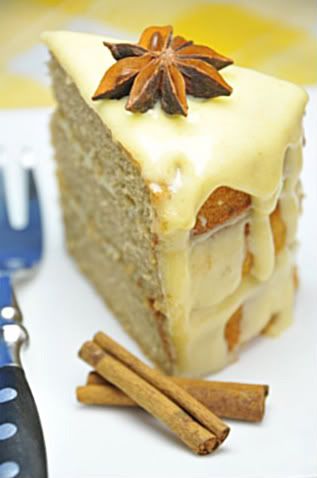
This month's Cake Slice Bakers will be baking a Chai Cake with Honey Ginger Cream ... sounds intriguing doesn't it! As I've not made a cake or any dessert with tea in it, I was really, really keen to try this out. Even more so after a fellow Cake Slice had posted that this happens to be her best cake so far from all the cakes we have baked from day one.


For me the hunt was on for Chai tea ... you ask me Ceylon, Assam, Green, Darjeeling, etc tea I can find it. But Chai ...??? I finally found it at one of the Cold Storage supermarket outlets and boy was it "cheap" (pardon me but this is me being sarcastic). The box cost me USD6 but what the heck, if I wanted this cake to be as authentic as possible, I would rather use Chai instead of another substitute.

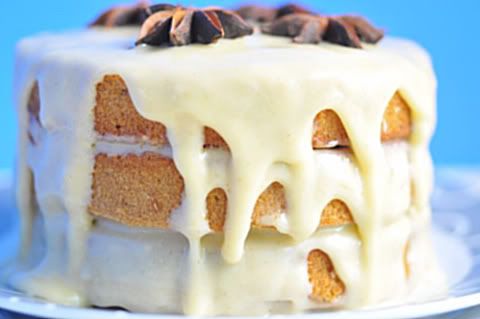
Rather than bake a full 8" cake, I halfed the recipe to a 4" triple layer instead. The layers were baked on Saturday and the frosting and assemblying of the cake was done on Sunday afternoon. Overall the cake was extremely good and I do agree that this recipe is probably either number 1 or 2 on my list of challenges we have done todate. However I do have a few comments about the original recipe:

** I didn't think the Chai flavour was strong enough and will use an extra bag of tea or two in future

** The frosting was a tad too sweet for my taste. So next time I'll either cut down on the amount of icing sugar or the honey used

** The amount of grated ginger in the frosting was certainly insufficient in my opinion. I actually added an additional teaspoon and to top it off, I also added a teaspoon of ground ginger. I tasted as I went along when blending the frosting and after the "additional additions" I gave it the thumbs up!


Chai Cake with Honey Ginger Cream
From Sky High:Irresistible Triple Layer Cakes by Alisa Huntsman and Peter Wynne

Ingredients:

1 and 1/3 cups of milk
6 chai tea bags, without added sweetner, such as Tazo
4 whole eggs
2 egg yolks
2 teaspoons of vanilla extract
2 and 3/4 cups of cake flour*
2 cups of sugar
4 and 1/2 teaspoons of baking powder
3/4 teaspoons of ground cinnamon
1/2 teaspoon of ground cardamom**
1/2 teaspoon of salt
8 ounces of unsalted butter at room temp.

[*1 cup of cake flour is equal to 3/4 cup of all purpose flour plus 2 tablespoons of cornstarch.]
[**Cardamom substitute is an equal amount of brown cardamom OR equal parts ground nutmeg and cinnamon OR equal parts ground cloves and cinnamon]


Method:

1) Preheat the oven to 350 Degrees F. Grease the bottom ans sides of the pans and line with parchment paper. Grease the paper as well.

2) In a small saucepan bring the milk to a simmer over low med-low heat. Add the tea bags, careful not to let the paper tag fall into the milk. Remove from heat and allow the tea to steep for 5 minutes. Remove the teabags and squeeze out the milk. Let the chai milk cool completely.

3) In a medium bowl mix the eggs, egg yolks, vanilla, and 1/3 cup of the chai milk. Whisk together.

4) Combine the flour, sugar, baking powder, cinnamon, cardamom, and salt in the bowl of a mixer. Beat on low for 30 seconds. Add the butter and the remaining chai milk, on med-low speed. Raise the speed to medium and beat until light and fluffy. Add the egg mixture in three additions scraping the between additions. Divide the batter evenly among the pans.

5) Bake the cakes for 26-28 minutes, or until a cake tester inserted in the middle comes out clean. Allow the cakes to cool in the pans for 10 minutes.Remove cakes from pans and peel off parchment paper. Cool completely.

6) To assemble the cake place one layer flat side down a serving plate and top with 2/3 cup of icing. Spread to the edge and repeat with second layer. Place third layer on top and spread the remaining ginger cream on top allowing it to drizzle down the sides of the cake like icicles.

Honey Ginger Cream

Ingredients:

2 and 1/2 cups of confectioners sugar
6 ounces of cream cheese at room temp.
6 tablespoons of unsalted butter at room temp.
1/2 cup of honey (any kind as long as liquid)
1/2 teaspoon of fresh grated ginger

Method:

Place all the ingredients in a food processor. Pulse to blend together, then scrape the sides of the bowl and pulse until smooth.


Thursday, April 16, 2009

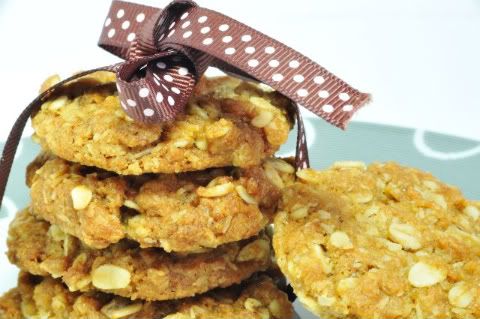
ANZAC Biscuits

I've heard that the classic Australian cookie is the ANZAC biscuit. These biscuits have long been associated with the Australian and New Zealand Army Corps (ANZAC) established in World War I.

There are a few theories as to the origins of ANZAC biscuits and these probably came about during the First World War, around 1914 to 1915. Some stories will foretell that ANZAC biscuits were made by the Australian/New Zealand troops in the trenches with whatever provisions they had at hand to relieve the boredom of their battle rations (and who could blame them). And some say they came about due to resourcefulness of the women on the "home front" in an endeavour to make a treat for their loved ones fighing the war.

There is even the suggestion that they originated from Scottish Oatmeal Cakes which is entirely possible. Whatever the origin, they have won the hearts of all Aussies the globe over as the pseudo National Biscuit. Today, ANZAC Biscuits are manufactured commercially for retail sale. Because of their military connection with the ANZACs and ANZAC Day, these biscuits are often used as a fundraising item for the Royal New Zealand Returned Services' Association (RSA) and the Returned and Services League of Australia (RSL) veterans' organisations.

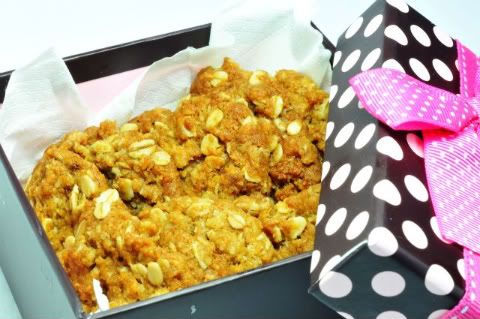
I've not tasted ANZAC biscuits before and to me it looked like any other oatmeal cookie. However this biscuit does have the addition of dessicated coconut and the method of preparation is somewhat different. It didn't have the creaming method so it made things a bit more easier. However I did find the rolling bit somewhat messy as the balls of biscuit dough was pretty oily. Overall it is a truly delicious chewy cookie with plenty of texture, think of it as a health snack bar if your guilty conscience starts to creep up on you!

ANZAC Biscuits
(recipe from Bills Sydney Food by Bill Grainger)
Makes 25 cookies


Ingredients:

1 cup plain all-purpose flour
1 cup desiccated coconut
2/3 cup brown sugar
1 cup rolled oats
125g unsalted butter
1 Tbsp golden syrup
1/2 tsp bicarbonate of soda (baking soda)
2 Tbsp boiling water

Method:

1) Preheat oven to 160C. Place flour, coconut, sugar and oats in a bowl. Mix well.

2) Place butter and golden syrup in a saucepan over medium heat and melt.

3) Place bicarbonate of soad in a small bowl and add hot water. Stir to combine. Add bicarbonate mixture to saucepan and stir. Pour over oat mixture and stir all ingredients together.

4) Roll teaspoon of biscuit mixture into balls and place on a greased and lined baking tray, leaving room for spreading. Flatten each ball gently with a fork.

5) Bake biscuits for 15 - 20 minutes or until biscuits are golden brown at the edges. The centers will be slightly soft but will harden when cooled. Allow biscuit to coll slightly on trays before transferring to a wire rack.

6) Store in air-tight containers.


Sunday, April 12, 2009

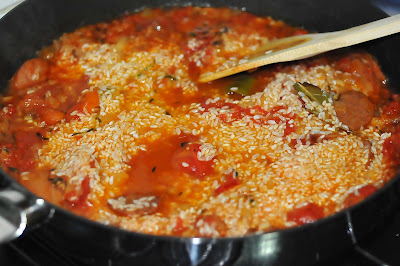
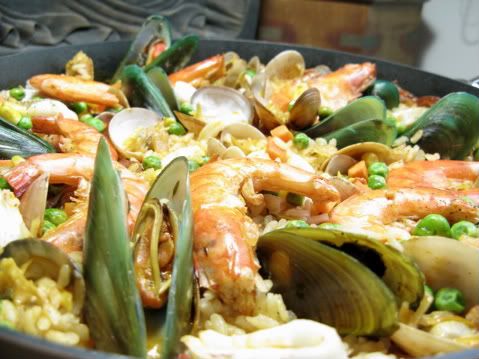
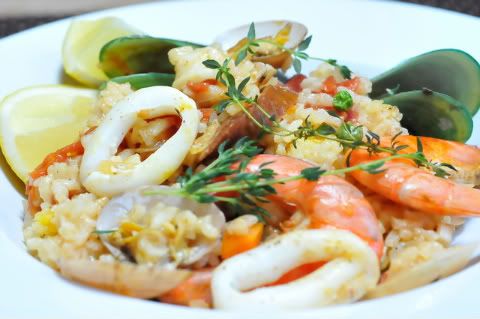
Seafood Paella

When I first saw a photo of Paella it remindered me of a seafood claypot rice (Asian rice dish cooked over a stove). However the type of rice used in a Paella is different and has a higher starch content than claypot rice. The colours of a Paella dish is so vibrant and appealing that I had to really give this dish a try. I even went to the extent of making a trip to Ikea solely to puchase a 34cm Paella pan ... call me mad or what!


What is Paella? Paella is a traditional Spanish cuisine originating from Valencia and is specially served on Sundays and holidays (though nowadays any day is a good day to have a Paella). It resembles a rissotto, using medium short-grained rice. A traditional Paella is made in a broad, shallow dish with sloping sides called a paella or paellera in some regions of Spain. The pan is usually around 13" in diameter. An important part of the flavor comes from the addition of saffron and the sofrito, or the combination of tomatoes, and garlic. The traditional way of cooking a Paella is to sautee the vegetables, meat or seafood in olive oil in different stages. Next, water is added, followed by rice. The mixture of meat, vegetables, and rice is stirred and then simmered slowly for approximately twenty minutes on low heat before the heat is raised to high to make the soccarat, the deliciously toasted bottom which is a delicacy in Valencian cuisine. After the soccarat has formed, the Paella is removed from the heat, allowed to cool slightly, and served.

However my version of Paella is prepared differently as I cooked the rice first and then added the seafood directly on top of the rice towards the end part of cooking time. I thought this was much simplier and didn't require too many messy dishes. The Paella came out beautifully done especially as I had used the freshiest of seafood. This is great entertaining dish and you can wow your guest by presenting the whole dish in it's pan.


Seafood Paella
(Serves 4)

Ingredients:

4-5 cloves garlic, minced
1 onion, minced
A few thyme sprigs
2 bay leaves (fresh or dried)
1 tsp of Spanish paprika (sweet or smokey, your choice)
2 cups of dry white wine
A pinch of saffron threads (about 15 threads or so)
2 cups arborio or other medium short grained, rounded rice (I used Australian medium short grain as arborio was way too expensive)
3 to 4 cups chicken broth (I used canned chicken broth but you could also use fish or vegetable broth)
1 medium sized squid, cleaned and cut into rings (the tentacles can also be used)
400g clams, soaked in water to remove the grit
About 10 mussels, soaked to remove grit, beard removed
500g medium sized prawns (trimmed, but leave the shell and head)
1 chiroza sausage sliced diagonally
1 can of chopped tomatoes (about 350g can)
1/2 cup frozen peas (defrosted)
Sea salt and black pepper to taste
Extra virgin olive oil

Method:

1) Add about 3 Tbsp of olive oil to the pan. Once heated add the onion and fry for about 3 minutes. Then add the garlic and fry until lightly brown. After that toss in the thyme and bay leaves.

2) Give it all a good stir and then add in the paprika, some sea salt and black pepper. Toss in the chiroza sausage to brown for about a minute before adding in the whole can of chopped tomatoes. Stir the mixture and let it reduce to about half.

3) Add in all the white wine and saffron. Let the sauce simmer for another 1 - 2 minutes, reducing slightly.

4) Now add in all the rice and give it a good stir. Let it come to a simmer and then add in half of the broth. Season with salt and more pepper (to taste). DO NOT STIR THE MIXTURE ANY MORE. THE WHOLE ESSENCE OF PAELLA IS TO HAVE A CRUST DEVELOP AT THE BOTTOM OF THE PAN.

5) Continue to cook the rice for about 10 minutes, letting the rice absorb the broth and wine. When the rice has absorbed most of the liquid, slowly add the remaining broth a bit at a time, letting the rice absorb more the broth. This should take about 5 minutes or so.

6) By this time, the rice should be almost cooked (taste to test). Now arrange the clams, mussells, prawns and squid on top of the rice. Let it cook until done. (I lightly covered the pan with a piece of foil to let the seafood cook through) Finally scatter the peas on top of the rice and let it soften.

7) Once cooked, remove the Paella from the stove and let stand for about 5 minutes. Dish out onto individual plates and serve with lemon wedges and freshly ground black pepper for taste.


Wednesday, April 8, 2009

Happy Easter and a Welcome to Spring!

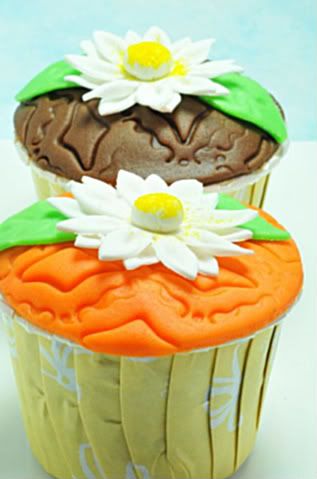
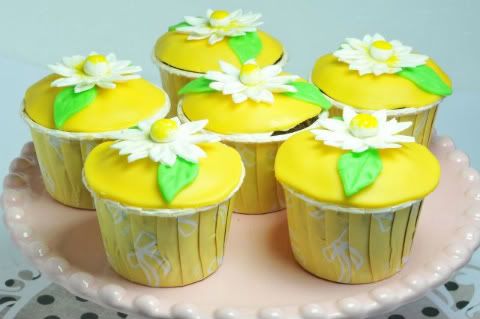
I am certainly in the mood for Easter which is just round the corner and when I came across some pictures of cupcakes beautifully decorated with Easter eggs, bunnies and little chicks I decided to do some myself. So in celebration of the coming Easter holidays and to usher in Spring (and not that Singapore has Spring as our weather here is either hot or hotter, and wet and wetter), the cupcakes I made over the weekend are dedicated to both these occassions. All the creations were given away to friends to enjoy, and I do hope that they did!


Chocolate Coffee Cupcakes
Recipe from Little Cakes from the Whimsical Bakehouse
(Makes about 20 regular cupcakes)


Ingredients:

1/2 cup of hot coffee
1/2 cup of cocoa powder
1/2 cup of cold water
1 1/2 cups of cake flour
1 teaspoons of baking soda
1/4 teaspoon of baking powder
1/4 teaspoon of salt
1 stick of unsalted butter
1 1/4 cup of sugar
2 large eggs
3/4 teaspoon of pure vanilla extract

Method:

1) Preheat the oven to 180°C (350°F) and have all ingredients at room temperature. Also have your cupcake liners and pans ready.

2) In a bowl, mix the hot coffee and cocoa powder together - no lumps! Whisk in the cold water.

3) In another bowl, sift the cake flour, baking soda, baking powder, and salt together.

4) Using your electric mixer, beat the butter and sugar until light and fluffy.
Slowly add in the eggs and the pure vanilla extract.

5) Alternate the two bowls (coffee mixture and flour mixture) into the batter.
Mix until smooth. Then using an ice cream scoop, scoop the batter into your cupcake liners.

6) Bake for about 20 - 22 minutes or until cake tester comes out clean.


Sunday, April 5, 2009

My First Fondant Cake

I recently attempted my first fondant cake after attending a couple of lessons and was quite pleased with the result. This little project took me over 3 days in total.

Firstly I made the flowers over a mid-week evening after work. The cake which is a 4 layer chocolate butter cake in 6" cake pans was baked on a Friday evening, after work again. The buttercream and layering of the cake was done on a Saturday morning and the final assembly with fondant and decoration was done on Sunday. By the time I finished my "little" project, I was completely knackered and this is only a 6" cake. I can't imagine bakers who actually attempt a 2 tier full size cake! I did tell myself that this is my very first attempt at tackling this on my own and therefore it was somewhat consoling. Unfortunately it was already night time when the photos were taken and coupled with the fact that my white light bulb had fused - it sure didn't help at all!

I carried the cake to work on Monday and my colleagues said that it was a piece of art. Way too pretty to cut up. Anyway the cake was meant to be eaten and enjoyed, and that was exactly what happened!


Chocolate Butter Cake
recipe from Joy of Baking
(serves 8 to 10 persons)


Ingredients:

120g unsweetened chocolate, chopped
1/3 cup (28g) unsweetened cocoa powder (not Dutch-processed)
1 cup (240 ml) boiling water
2 1/4 cups (315g) all purpose flour
2 tsp baking powder
1 tsp baking soda
1/4 tsp salt
1 cup (226g) unsalted butter, room temperature
2 cups (400 g) granulated white sugar (I used 1 3/4 cups sugar instead)
3 large eggs
2 tsp pure vanilla extract
1 cup (240 ml) milk

Method:

1) Preheat oven to 350F (177C) and place rack in center of oven. Butter, or spray with a nonstick vegetable spray, and line with parchment paper, two - 9 x 2 inch deep (23 x 5 cm) round baking pans. Set aside

2) In a stainless steel or heatproof bowl place the chopped unsweetened chocolate and cocoa powder. Pour the boiling water over the chocolate and cocoa powder and stir until they have melted. Set aside to cool while you make the batter.

3) In a separate bowl, whisk to combine, the flour, baking powder, baking soda, and salt. Set aside.

4) In the bowl of your electric mixer, or with a hand mixer, cream the butter. Gradually add the sugar and continue beating until the mixture is fluffy (this will take about 3-5 minutes). Add the eggs, one at a time, mixing well after each addition. Add the vanilla extract and melted chocolate mixture and beat to combine.
5) Add the milk and flour mixtures in three additions, beginning and ending with the flour mixture. Beat only until the ingredients are incorporated.

6) Divide the batter evenly between the two prepared pans and smooth the tops. Bake for about 35 - 40 minutes or until a toothpick inserted in the center comes out clean and the tops spring back when lightly pressed. Remove from oven and place on a wire rack to cool for about 10 minutes. Butter or lightly spray a wire rack with Pam before inverting the cakes onto the rack to prevent the cakes from sticking. Cool the cakes completely before frosting.

White Chocolate Buttercream Frosting:

567g imported white chocolate, chopped
1 3/4 cups plus 2 tablespoons unsalted butter, room temperature
2 tsp vanilla extract
2 cups powdered (icing) sugar, sifted

Stir white chocolate in top of double boiler over barely simmering water until melted and smooth. Remove white chocolate from over water. Let stand until cool but not set, about 20 minutes. Using electric mixer, beat butter in large bowl until fluffy. Beat in white chocolate and vanilla, scraping down sides of bowl occasionally. Beat in powdered sugar. Cover and refrigerate until thick enough to spread, about 45 minutes (frosting will be very soft).

To Assemble:

Place one layer of cake, top side down, on your serving plate and cover with a layer of frosting. Then place the second layer of cake, top side down, onto the first cake layer and then frost the top, repeat with the other 2 remaining layers. Finally add frosting to the top and the sides of the cake and smoothen out. Decorate either with more buttercream, shaved chocolate or fresh fruit.


Wednesday, April 1, 2009

Lemon Curd Shortbread

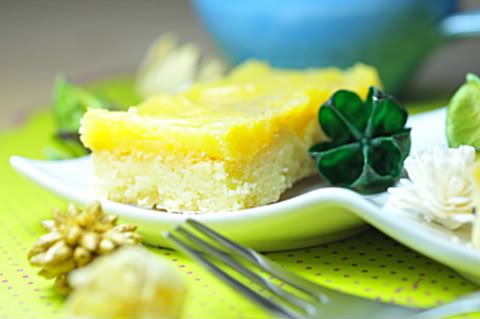
It must be the month for lemons as I seem to be buying a lot more than usual and coming up with recipes that uses them. I had actually made the lemon curd with the intention of frosting the layers of a cake. Unfortunately I never got down to baking the cake and had wanted to use the curd for something simple. I guess the simplest option would have been to leave the curd in its original state and use it as a bread spread. But I decided to try a version of lemon slice, a lemon curd shortbread which I came across. The curd was already done, so I just needed to bake the shortbread.


The shortbread took me about 6 minutes to put together ... I kid you not. The baking and cleaning up took the most time. I took some to office and had everyone raving for. One of my colleagues who I didn't know was given a piece to try, came up to me and said "can I have some more"! I gave him a weird look as I had no clue as to what he was asking at first but I did promise him 3 helpings if I were to make it again in the future. By the way, my hubby loved it and for someone who doesn't eat cakes or cookies, that says so much!


Lemon Curd Shortbread
Adapted from The Ultimate Lemon Butter Bar Recipe

For the Shortbread
Ingredients:


141g unsalted butter
2 Tbsp icing sugar
2 Tbsp white granulated sugar
1 1/4 cups all-purpose flour

Method:

1) Pre-heat oven to 162C (325F).

2) In a large bowl, cream butter with the icing and granulated sugar until light and fluffy. Add all the flour to butter and mix quickly with fingers until dough compacts into very large, loose crumbs with all the flour absorbed. Do not over handle the mixture and do not be concerned that the dough does not form a ball.

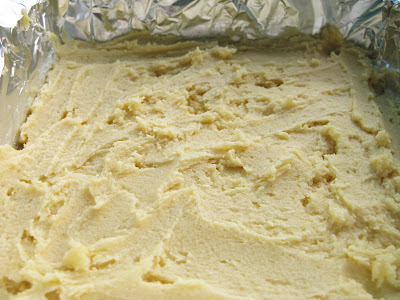
3) Empty dough into an 8 inch by 8 inch metal baking pan that has been lined with aluminum foil (do not grease the foil) long enough to extend beyond pan from one side to the opposite. This will serve as the handles to easily lift the shortbread from the pan after it has cooled and is ready to cut. Lightly and evenly press and pat dough into pan. Prick dough all over with a fork. Bake on center rack of oven for 30 minutes or until dough is biscuit golden but not browned.

4) Remove from oven and lower oven temperature to 149C (300F). Pour and smooth lemon curd (recipe follows) on top of shortbread, returning it to oven to bake for 10 minutes. Remove from oven and allow pan to cool completely before transferring pan to refrigerator, chilling a minimum of ½ hour before carefully lifting shortbread from pan to a cutting board, keeping foil intact.

5)Carefully cut shortbread into squares with a long knife. The lemon curd will cut clean since it has had time to set. Dust squares with powdered sugar (optional).


For the Lemon Curd
Ingredients:

2 Tbsp finely minced lemon zest (about 2 medium lemons)
2 large egg yolks, lightly beaten
3 large whole eggs, lightly beaten
113g unsalted butter, melted
3/4 cup granulated sugar
1/2 cup freshly squeezed lemon juice (about 2-3 medium lemons)

Method:

1) Whisk all ingredients together in a medium stainless steel saucepan.

2) Place the saucepan on the stove and turn on heat to medium (or medium-low if you are more timid). Stir constantly with a whisk until it starts to thicken a little. Make sure you are standing by your stove the entire time. Do not and absolutely do not move away from the stove!

3) Once it starts to thicken, switch to a large flat-bottom spatula and stir frequently, making sure to scrape the bottom of pan so that the curd thickens evenly without burning the bottom.

4) Continue to stir and cook until very thick on a low to medium fire. This will take about 15 minutes or so.

5) Strain the curd through a metal sieve (to get a very smooth curd) into a bowl.

6) Cover with plastic wrap right on the surface of the curd (to prevent a skin from forming) and chill.

7) You make the lemon curd ahead of time. Keep refrigerated in a sealed container or sterilized bottle.


Related Posts with Thumbnails